
bathroom remodeling
Why Your Beautiful Tile Cracked (And How to Prevent It From Happening Again)
Picture this: You just finished that gorgeous bathroom renovation in your Rochester Hills home, or maybe you finally splurged on those stunning porcelain tiles for your Shelby Township kitchen. Everything looks perfect... until six months later when you notice that dreaded crack running right through the middle of your favorite tile.
Sound familiar? If you're a homeowner in Macomb Township, Harrison Township, St. Clair Shores, or Grosse Pointe, you've probably seen this frustrating scenario play out more times than you'd like to admit. The good news? It's usually not the tile's fault it's all about how it was installed.
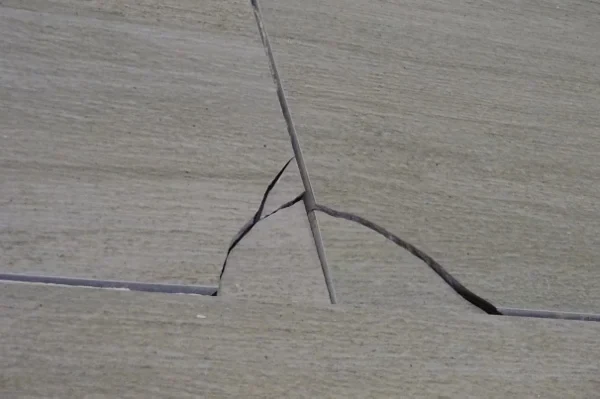
The Real Culprit: Poor Installation Technique
Here's the thing that might surprise you: tile and stone are incredibly durable materials that should last a lifetime when installed correctly. Porcelain tiles, especially, can handle some serious abuse. But when they're not properly set, even the toughest tiles become vulnerable to cracking from normal everyday use.
The secret sauce? It's all in how the mortar is applied and troweled. We've put together a video (check it out below!) that shows exactly what we're talking about, but let me break down the basics for you.
The "Spot Bonding" Trap
One of the biggest mistakes we see in installations throughout the Metro Detroit area is what's called "spot bonding." This is where installers basically dab mortar in a few spots under the tile instead of creating full coverage. Sure, it's faster and easier to get tiles to sit flat this way, but it's setting you up for failure.
At HomeWorks CGO Inc, we never use spot bonding techniques because we know it's a recipe for disaster. Think of it like this: when only parts of your tile are actually stuck to the floor, the unsupported areas become weak spots. Any impact or heavy load is going to find those weak spots and – crack! – there goes your beautiful tile.
The Right Way: HomeWorks CGO Inc's Straight-Line Troweling Method
The proper technique involves what we call "playing it straight" – and there's a reason HomeWorks CGO Inc swears by this NTCA-recommended method. Instead of swirling the mortar around (which traps air and creates voids), we comb it in straight lines, all going in the same direction.
Our Step-by-Step Installation Process
Here's the exact process we use at HomeWorks CGO Inc for all our installations in Rochester Hills, Shelby Township, and surrounding areas:
Key in the mortar: First, we use the flat side of the trowel to press a thin layer of mortar into the substrate
Add more mortar: Then we add another layer and comb it into straight ridges
Direction matters: For rectangular tiles, we run the ridges across the short direction of the tile
Back-butter when needed: For large format tiles, natural stone, or exterior applications, we also apply mortar to the back of the tile
Coverage Standards You Should Know About
The industry standards aren't just suggestions – they're there for a reason, and HomeWorks CGO Inc strictly adheres to these requirements. Interior tiles need at least 80% mortar coverage, while exterior and wet areas require 95%. Natural stone needs 95% coverage everywhere, no exceptions.
When we're working on projects in St. Clair Shores or Grosse Pointe, we always check our coverage by pulling up a tile during installation. You should see collapsed ridges with no missing mortar on either the tile or the substrate.
Large Format Tiles: Extra Challenges
Those beautiful large format tiles (anything with a side 15 inches or longer) that are so popular right now? They require even more precision, which is why HomeWorks CGO Inc takes extra care with these installations. The substrate needs to be flatter – we're talking about variations no more than 1/8" in 10 feet, compared to 1/4" in 10 feet for regular tiles.
Plus, many large tiles actually warp slightly during manufacturing, with the center doming upward. This makes proper mortar coverage even more critical and air removal more challenging.
The Bottom Line
Whether you're planning a renovation in Macomb Township or dealing with failed tile in Harrison Township, the key to long-lasting results is proper installation technique. At HomeWorks CGO Inc, we believe it's worth taking the time to do it right the first time – it might take a little longer upfront, but it's way cheaper than having to redo the whole job when tiles start cracking.
Check out our video below to see the difference between proper straight-line troweling and the problematic swirl method. You'll be amazed at how much of a difference the HomeWorks CGO Inc technique makes!Whether you're planning a renovation in Macomb Township or dealing with failed tile in Harrison Township, the key to long-lasting results is proper installation technique. At HomeWorks CGO Inc, we believe it's worth taking the time to do it right the first time – it might take a little longer upfront, but it's way cheaper than having to redo the whole job when tiles start cracking.
Check out our video below to see the difference between proper straight-line troweling and the problematic swirl method. You'll be amazed at how much of a difference the HomeWorks CGO Inc technique makes!
Ready for Professional Installation with HomeWorks CGO Inc?
If you're in Rochester Hills, Shelby Township, Macomb Township, Harrison Township, St. Clair Shores, or Grosse Pointe and want tile installation done right the first time, HomeWorks CGO Inc is here to help. Our team follows NTCA-recommended ANSI standards on every project – because your investment deserves to last.
Contact HomeWorks CGO Inc today to discuss your next tile project. Trust us, your future self will thank you for choosing quality installation over quick fixes!
Thinking about your own project?
Explore our bathroom remodeling services or talk with our team about your space.
Talk with HomeWorks